
DIY Peel and Stick Tile + Pantry Organization
I call it “Isolation Renovation” and it can best be described as an ongoing urge to redecorate, purge, and organize your entire home during Covid19.
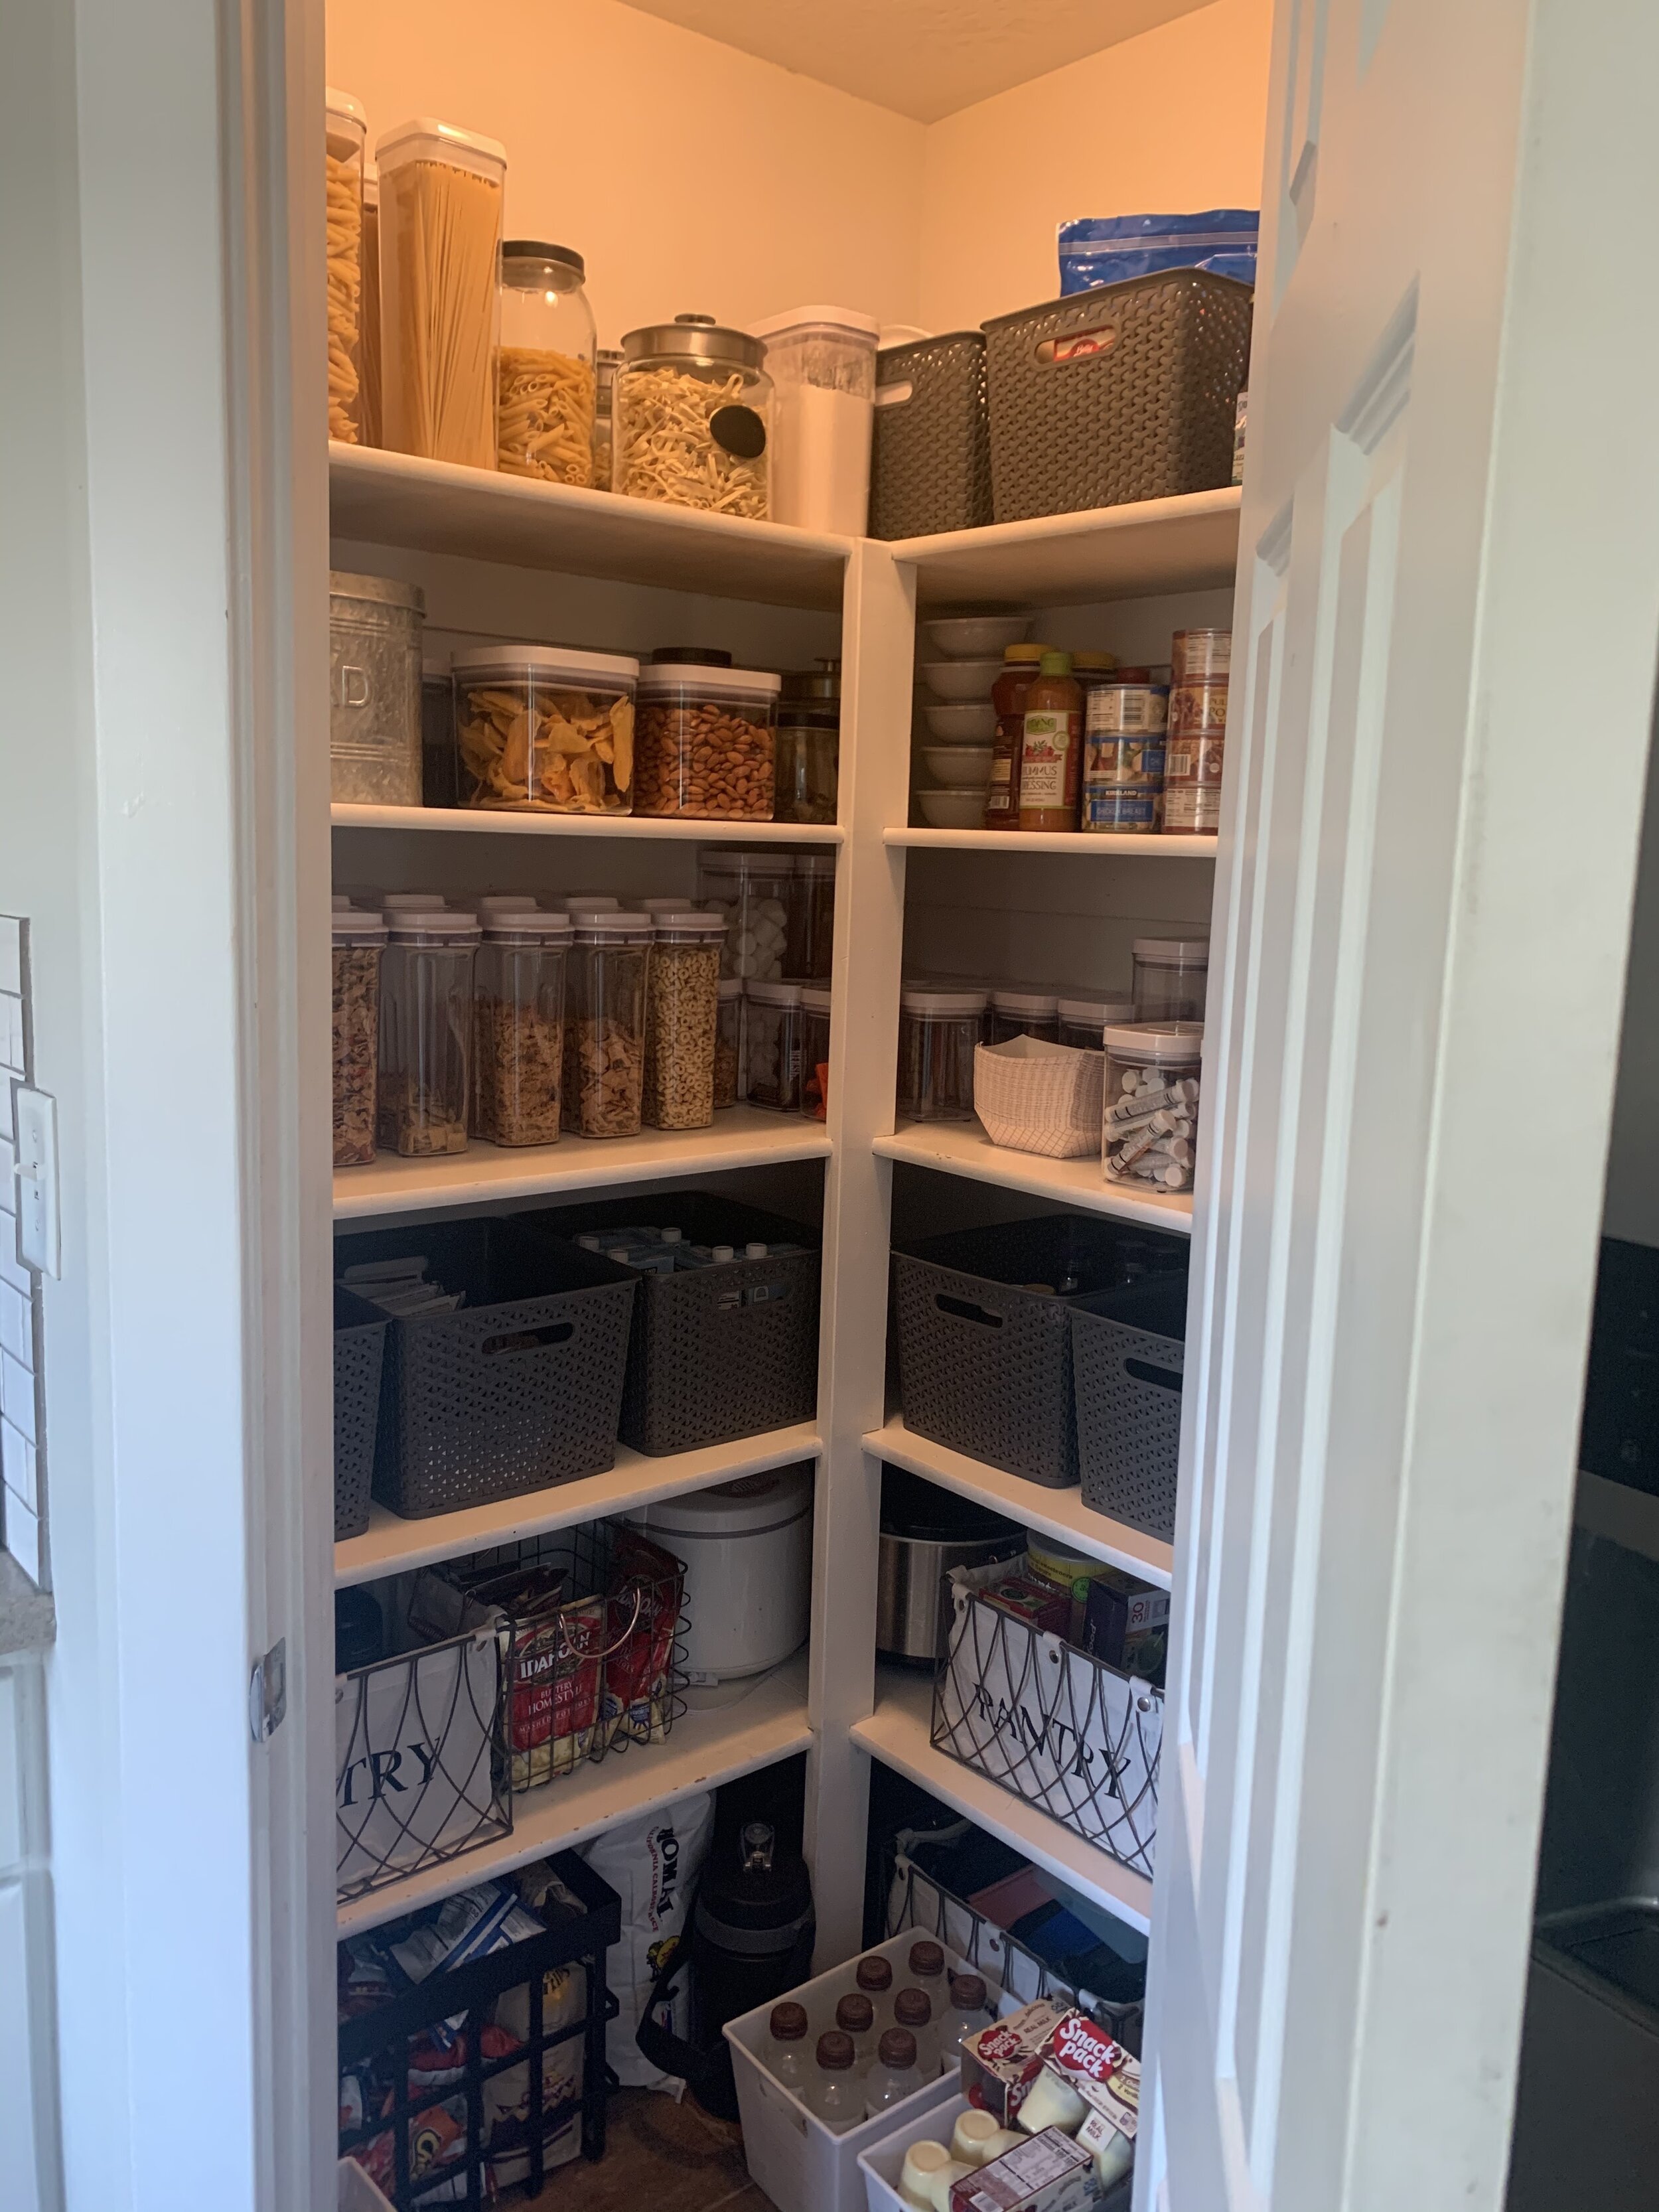
First up on my list of organization priorities was my pantry. It was an unorganized mess and needed a major overhaul. See the before here:

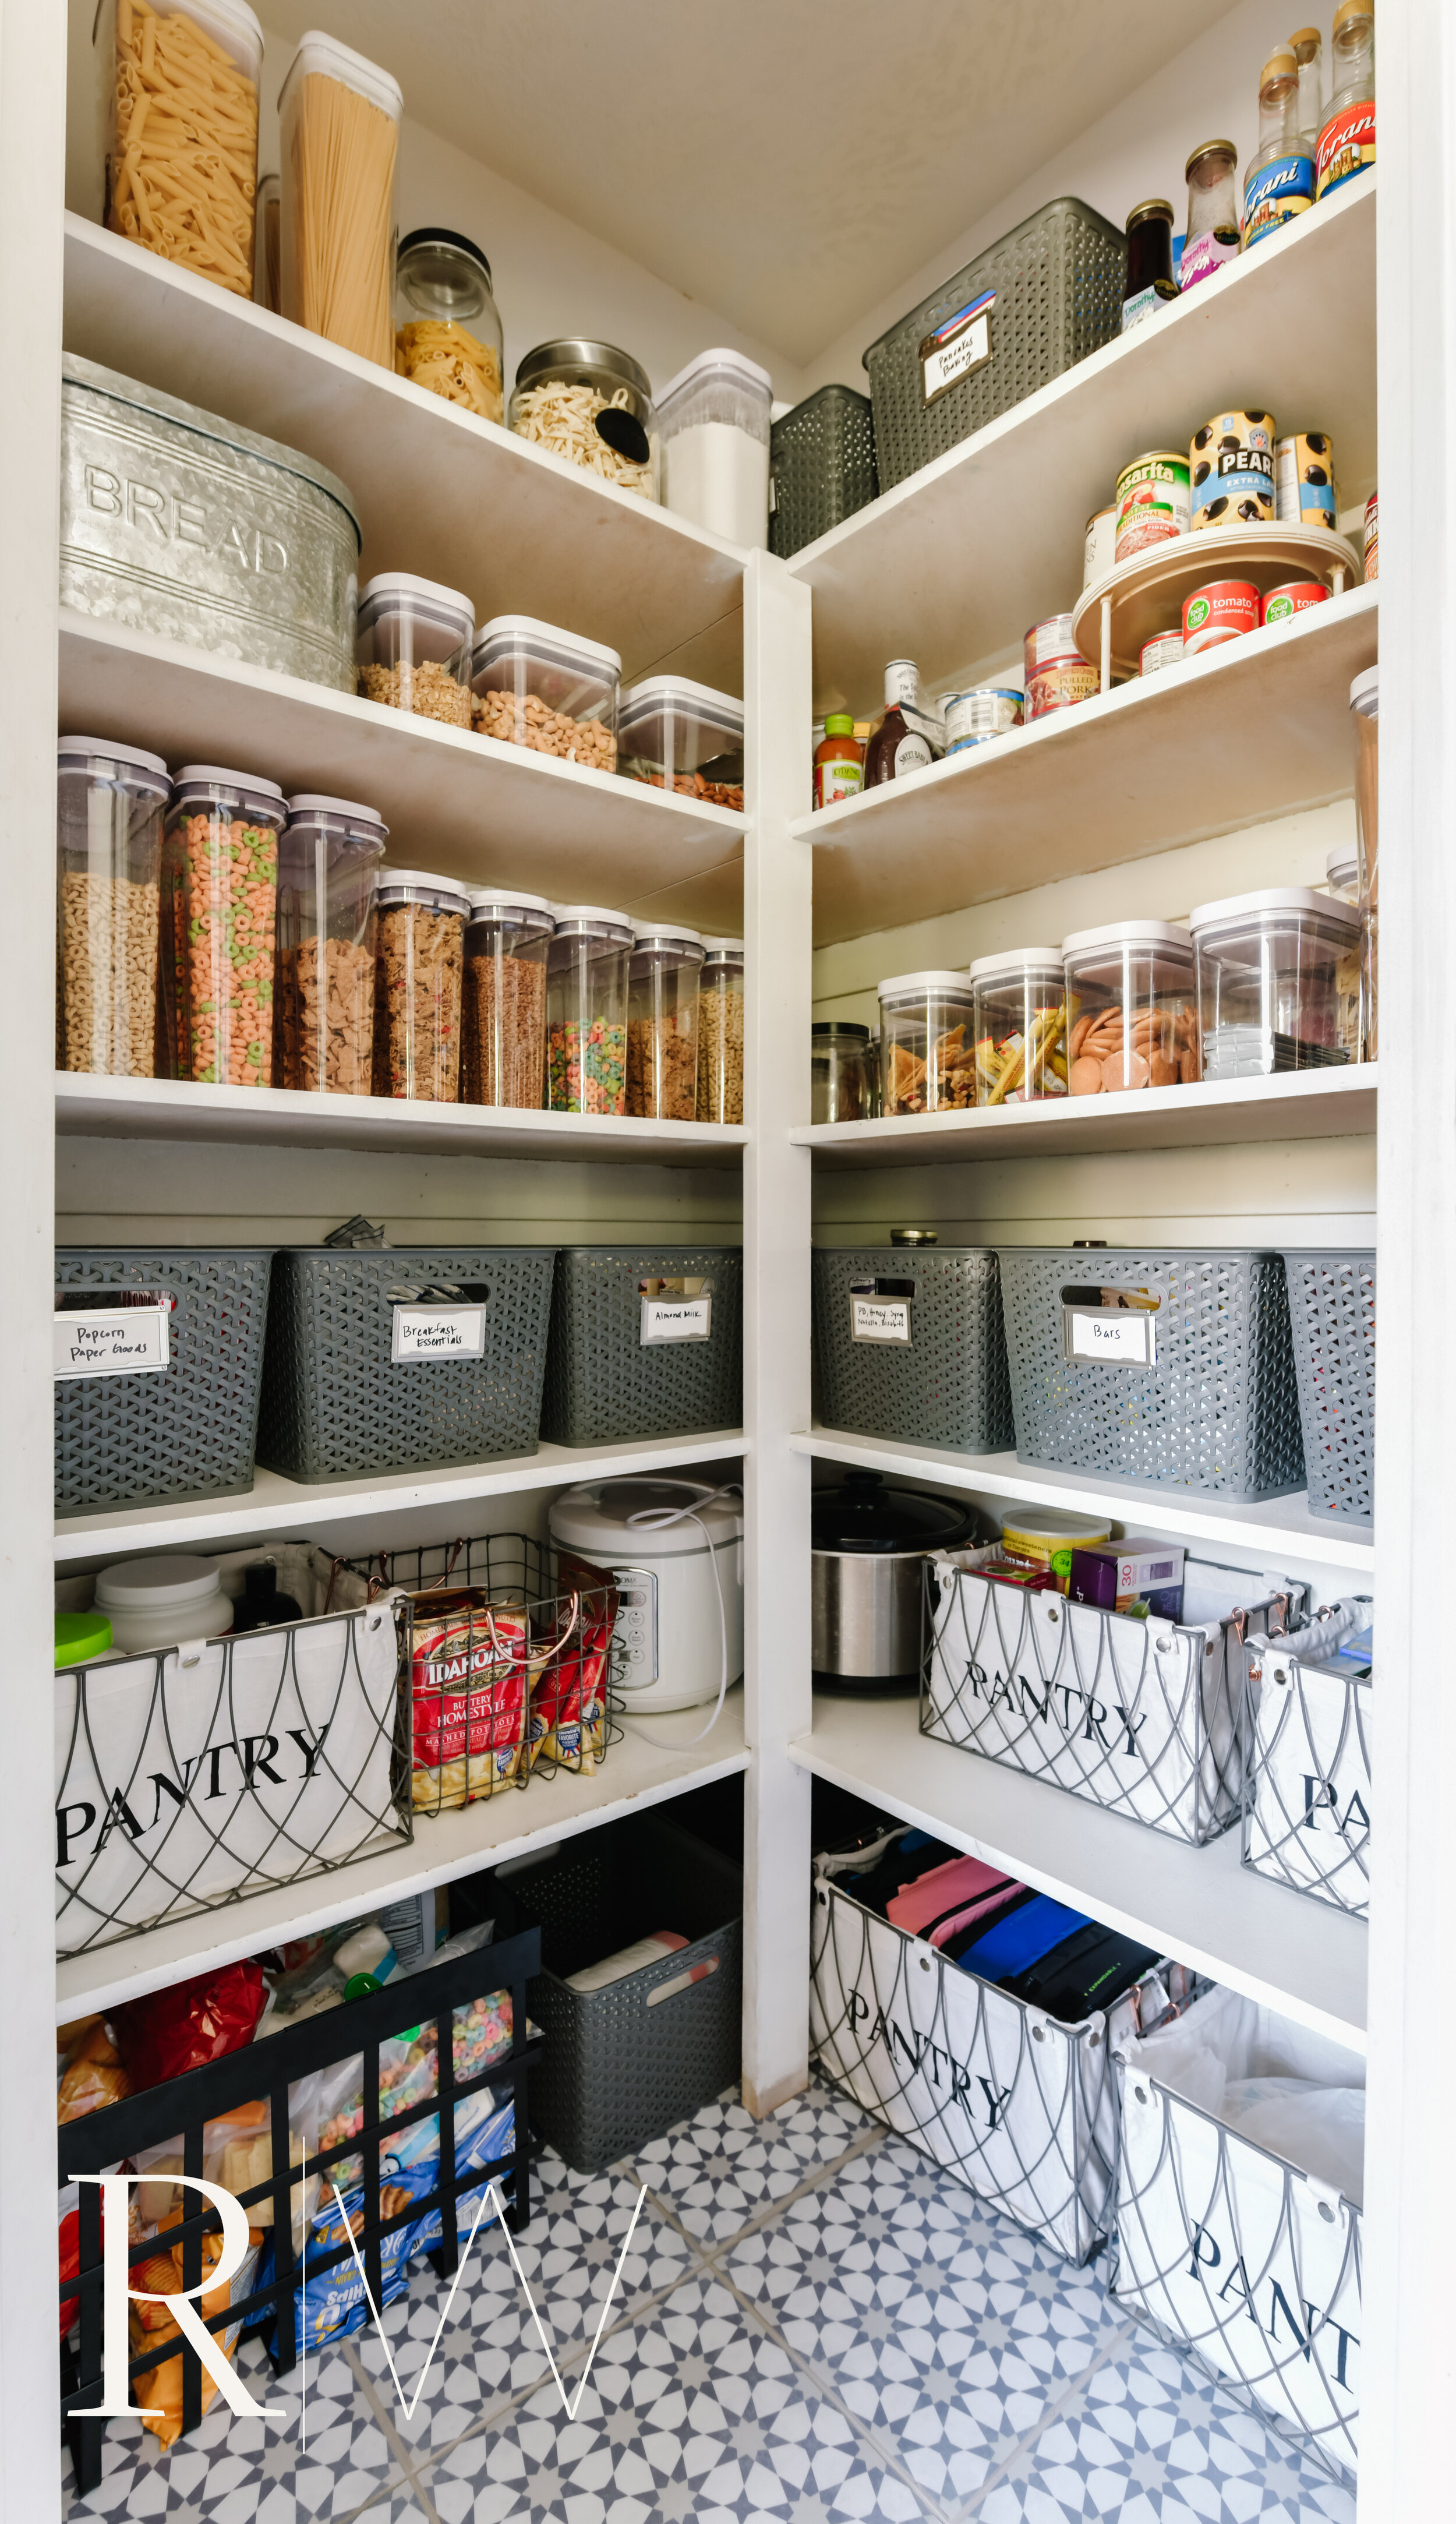
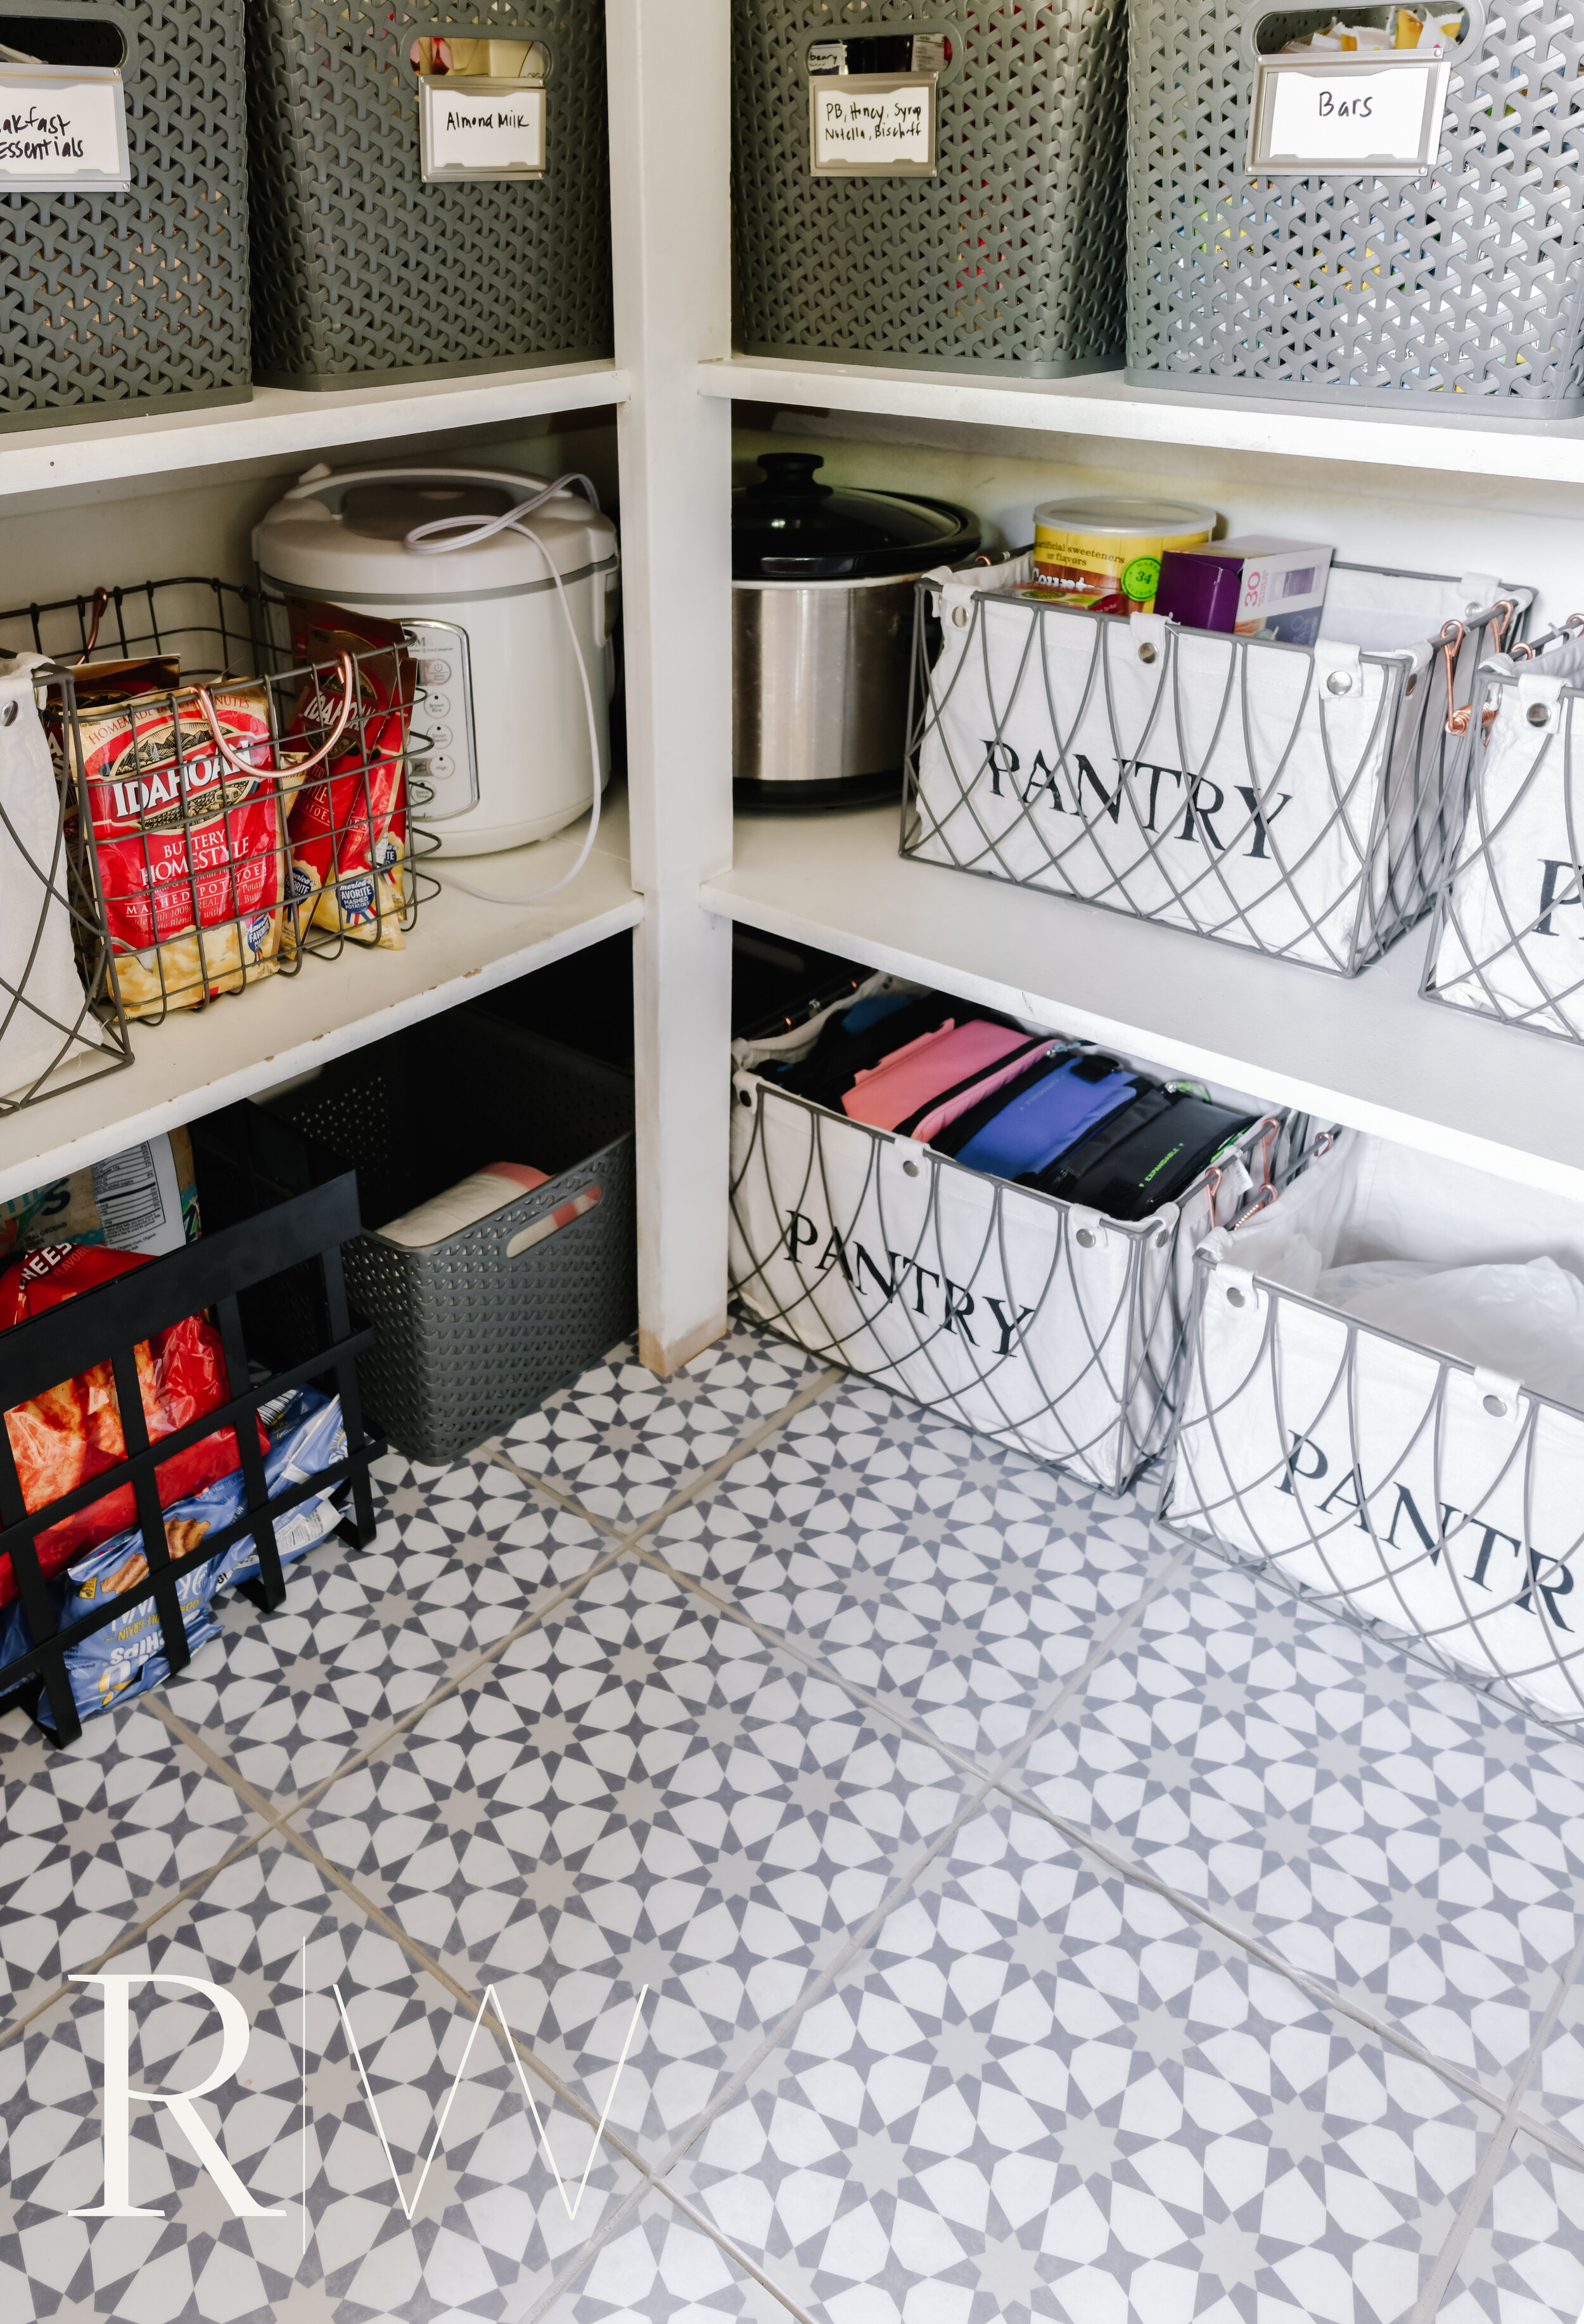
I am not quite sure how we were functioning with such a disaster of a pantry. I could never find what I needed, and I never knew where to put our boxed food when we brought in groceries. I found some great organization materials and enlisted the help of my daughter and her friends. Within two hours the pantry looked like this:
I have linked to the organization supplies here:

The organized pantry was wonderful. I finally had a place to put my groceries! I could find the things I needed and it seemed that everything had it’s own designated place. The only downside was that now that the floor was cleaned up and visible, it made the gross orange slate tile impossible to miss. This tile was all the rage in the early 2000s. I don’t know why. It was a total eyesore and it needed to go. The project was small so I really didn’t want to hire someone to rip out the tile and lay new tile. Tile projects are messy, time-consuming, and expensive. I began exploring options on Google and stumbled upon an Etsy shop that sells peel-and-stick vinyl tile.
I am NOT a DIY-er. Like, at all. But after reading so many positive reviews about the peel-and-stick tiles, I decided I could give it a try. After all, the pantry was small.
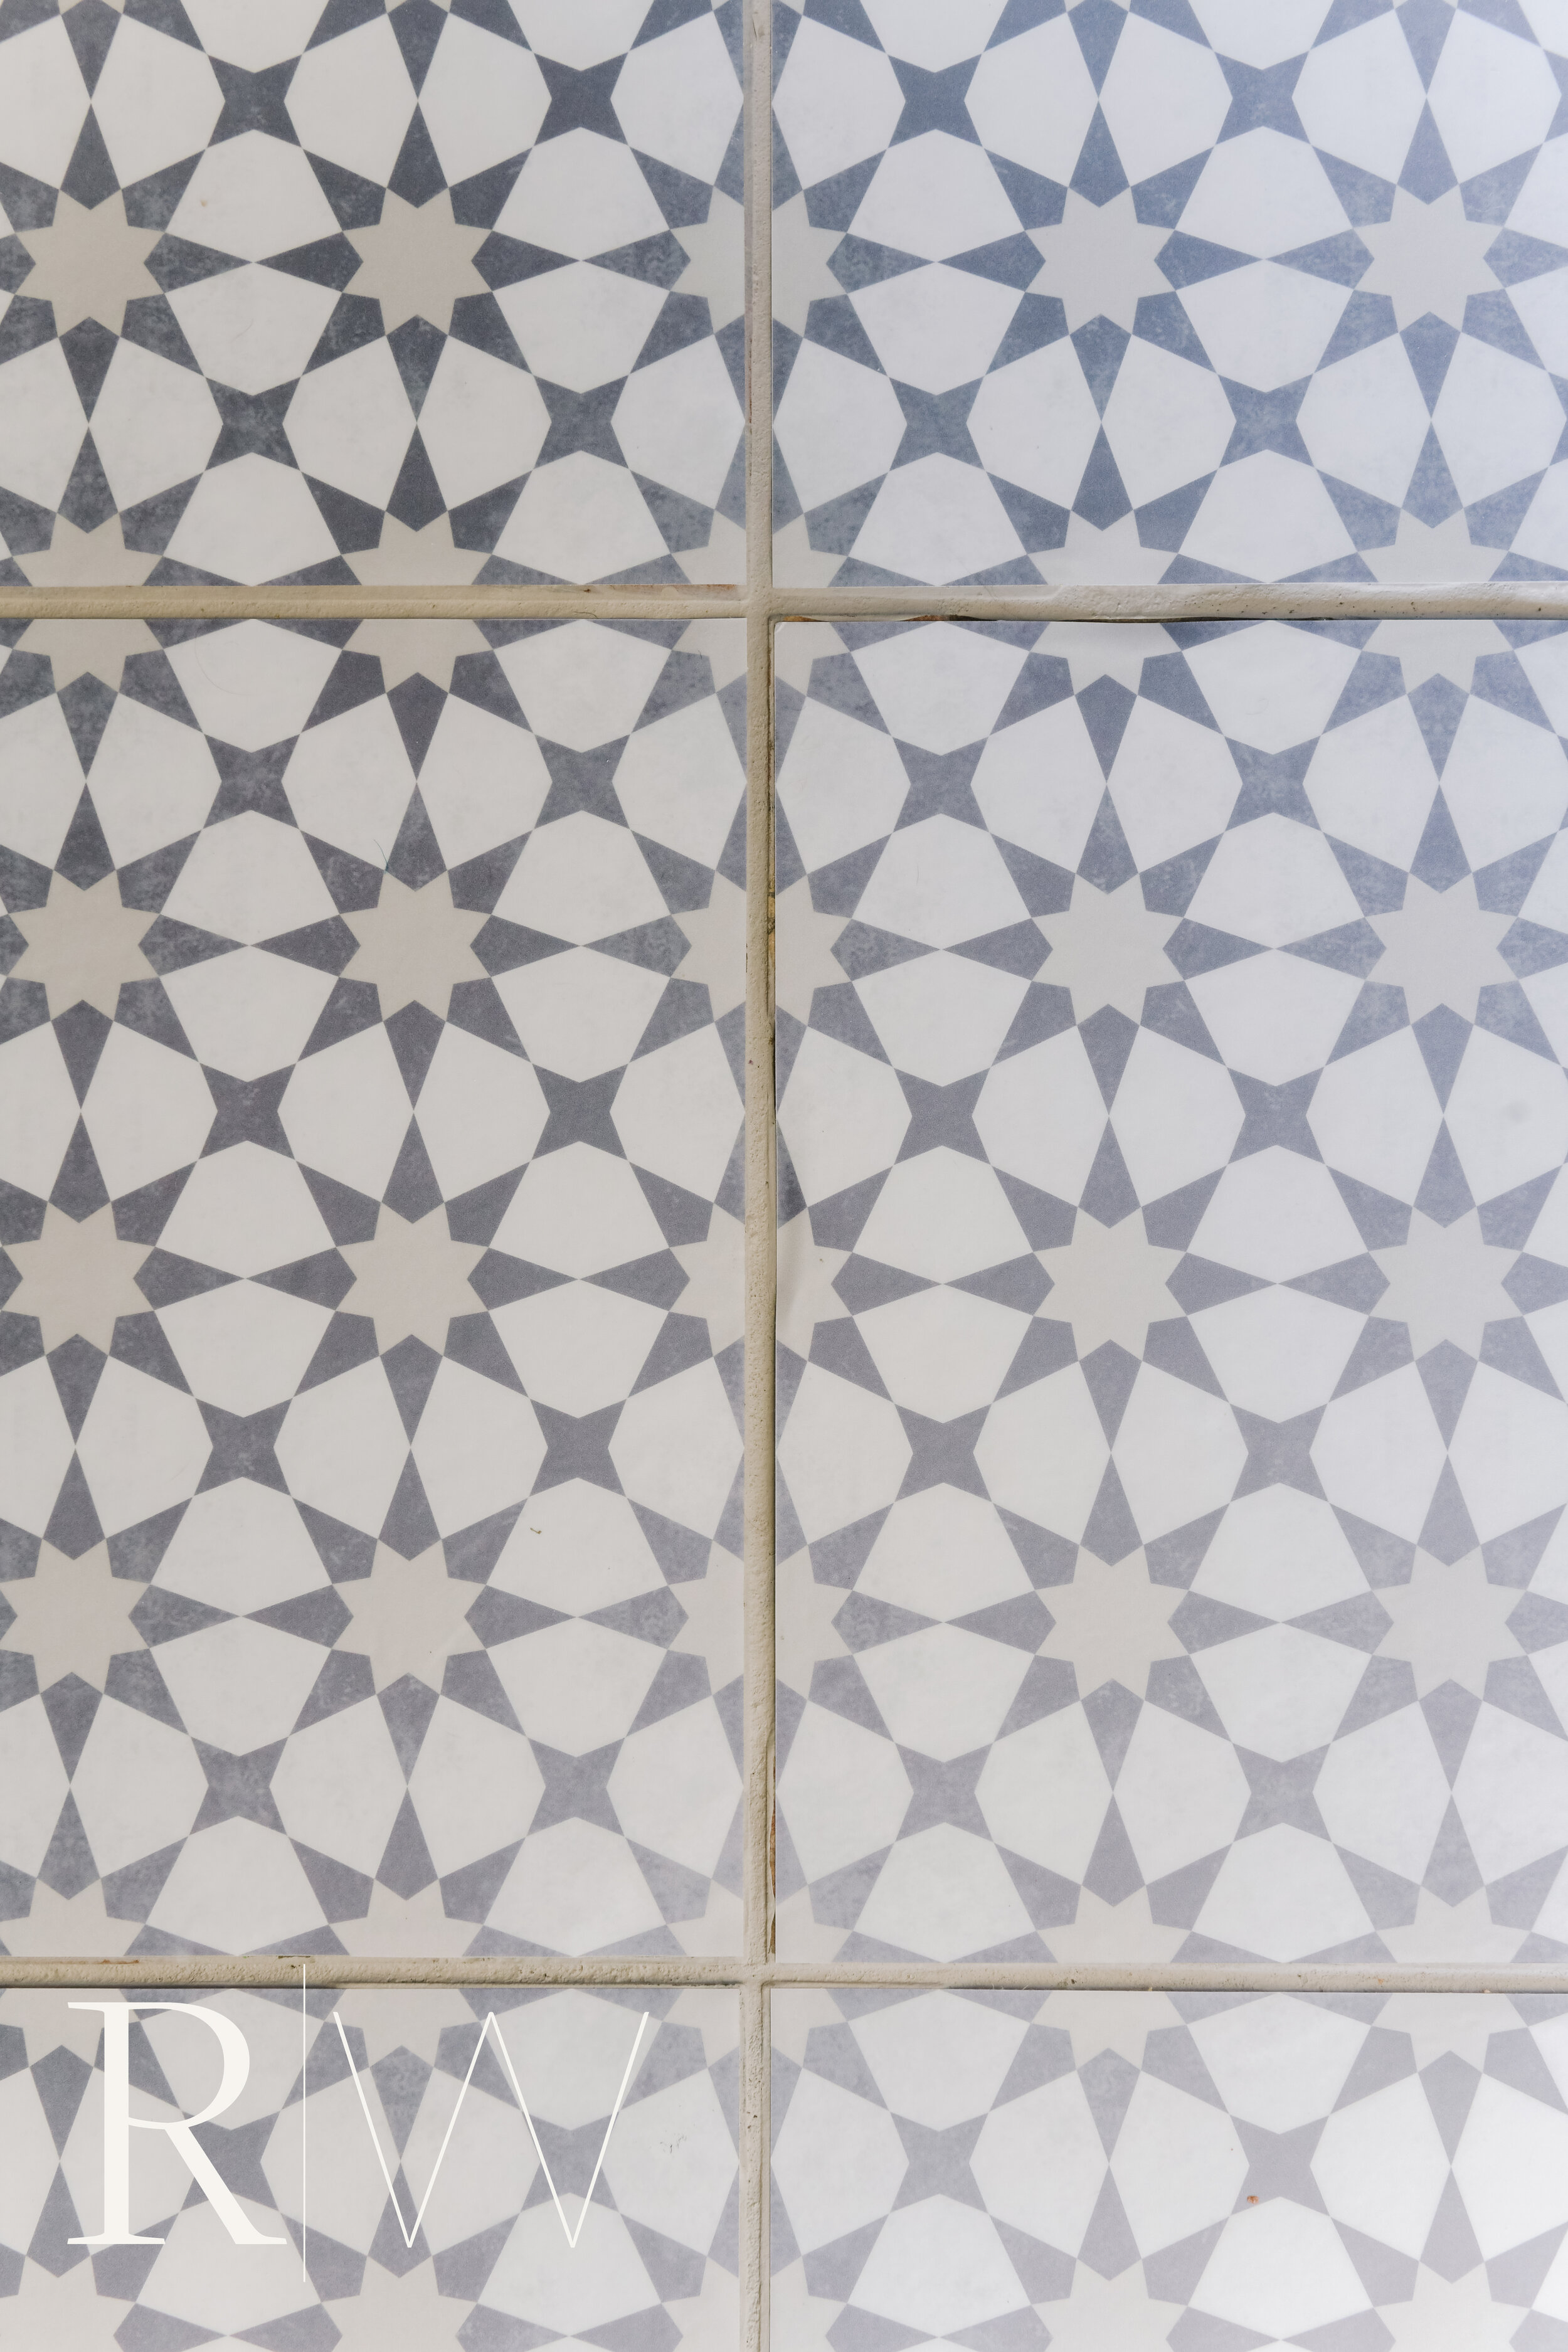
I ordered a pack of 12x12 tiles in the Agadir pattern. They were a little slow to arrive since they were shipping from Indonesia, but they did arrive in a secure package with detailed instructions on how to “lay” the tiles. The best thing about these tiles are that they are thin, pliable, easy to cut, easy to remove, and stick to ceramic tile like a dream once they are securely adhered.
In addition to the tiles I ordered some Grout Renew so that I could refresh and change the color of my grout. I chose DRIFTWOOD and it took my grout from a dingy brown to a fresh warm grey color.

Because my tile had a slate texture, I had to use a coat of polycrylic over it to make the tile easier to adhere to. You do NOT need to coat your tiles with polycrylic. I had to because of the rough and uneven texture of my tile. If you have smooth tile, you are good to go! After my tile was clean and coated with polycrylic I painted the grout lines with the Grout Renew. I let that dry for a couple of hours and then began laying the tile from the center of the floor to the outside edges. It was literally as easy as peeling and sticking the tile. Lining up the patterns was easy and cutting the vinyl was super easy with scissors and a utility blade. Each time a laid a tile I would smooth out all the air bubbles with a putty knife to ensure they were securely fastened to the tile. I’ve posted some time-lapse videos on my Instagram that show the process of laying the tiles.
So here we go TL;DR, the finished pantry, organized with new tile!

It’s not perfect, but it sure is better than the original tile! I’ve made a list of all the supplies I used below. I make a small commission if you purchase any of my recommended products. Thank you for following along. xo Rebekah